Flat Roof Repair in San Diego: Spotting Problems Before They Spread
Most flat roof leaks in San Diego start small and silent: a hairline split in a heat-welded seam, a cracked rubber boot around a vent pipe, a drain slowly choking on jacaranda debris. By the time a stain appears on the ceiling, water has usually been tracking across the deck for weeks. The most valuable habit a flat-roof owner can build is reading those early signals — because a flashing detail caught early stays a flashing detail, while the same leak ignored becomes a soaked, rotting deck. This guide covers how flat roofs fail in our climate, how to judge the work that fixes them, and when a roof's age and condition mean it's time to replace rather than patch.
This comes from what we see in the field. Peak Builders & Roofers of San Diego has worked on more than 5,000 roofs since 1999 (CSLB #1008986), and the low-slope membranes — on ADUs, garage conversions, mid-century homes, and commercial buildings from Kearny Mesa to Miramar — fail in patterns you can learn to anticipate.
Why San Diego Is Hard on Flat Roofs
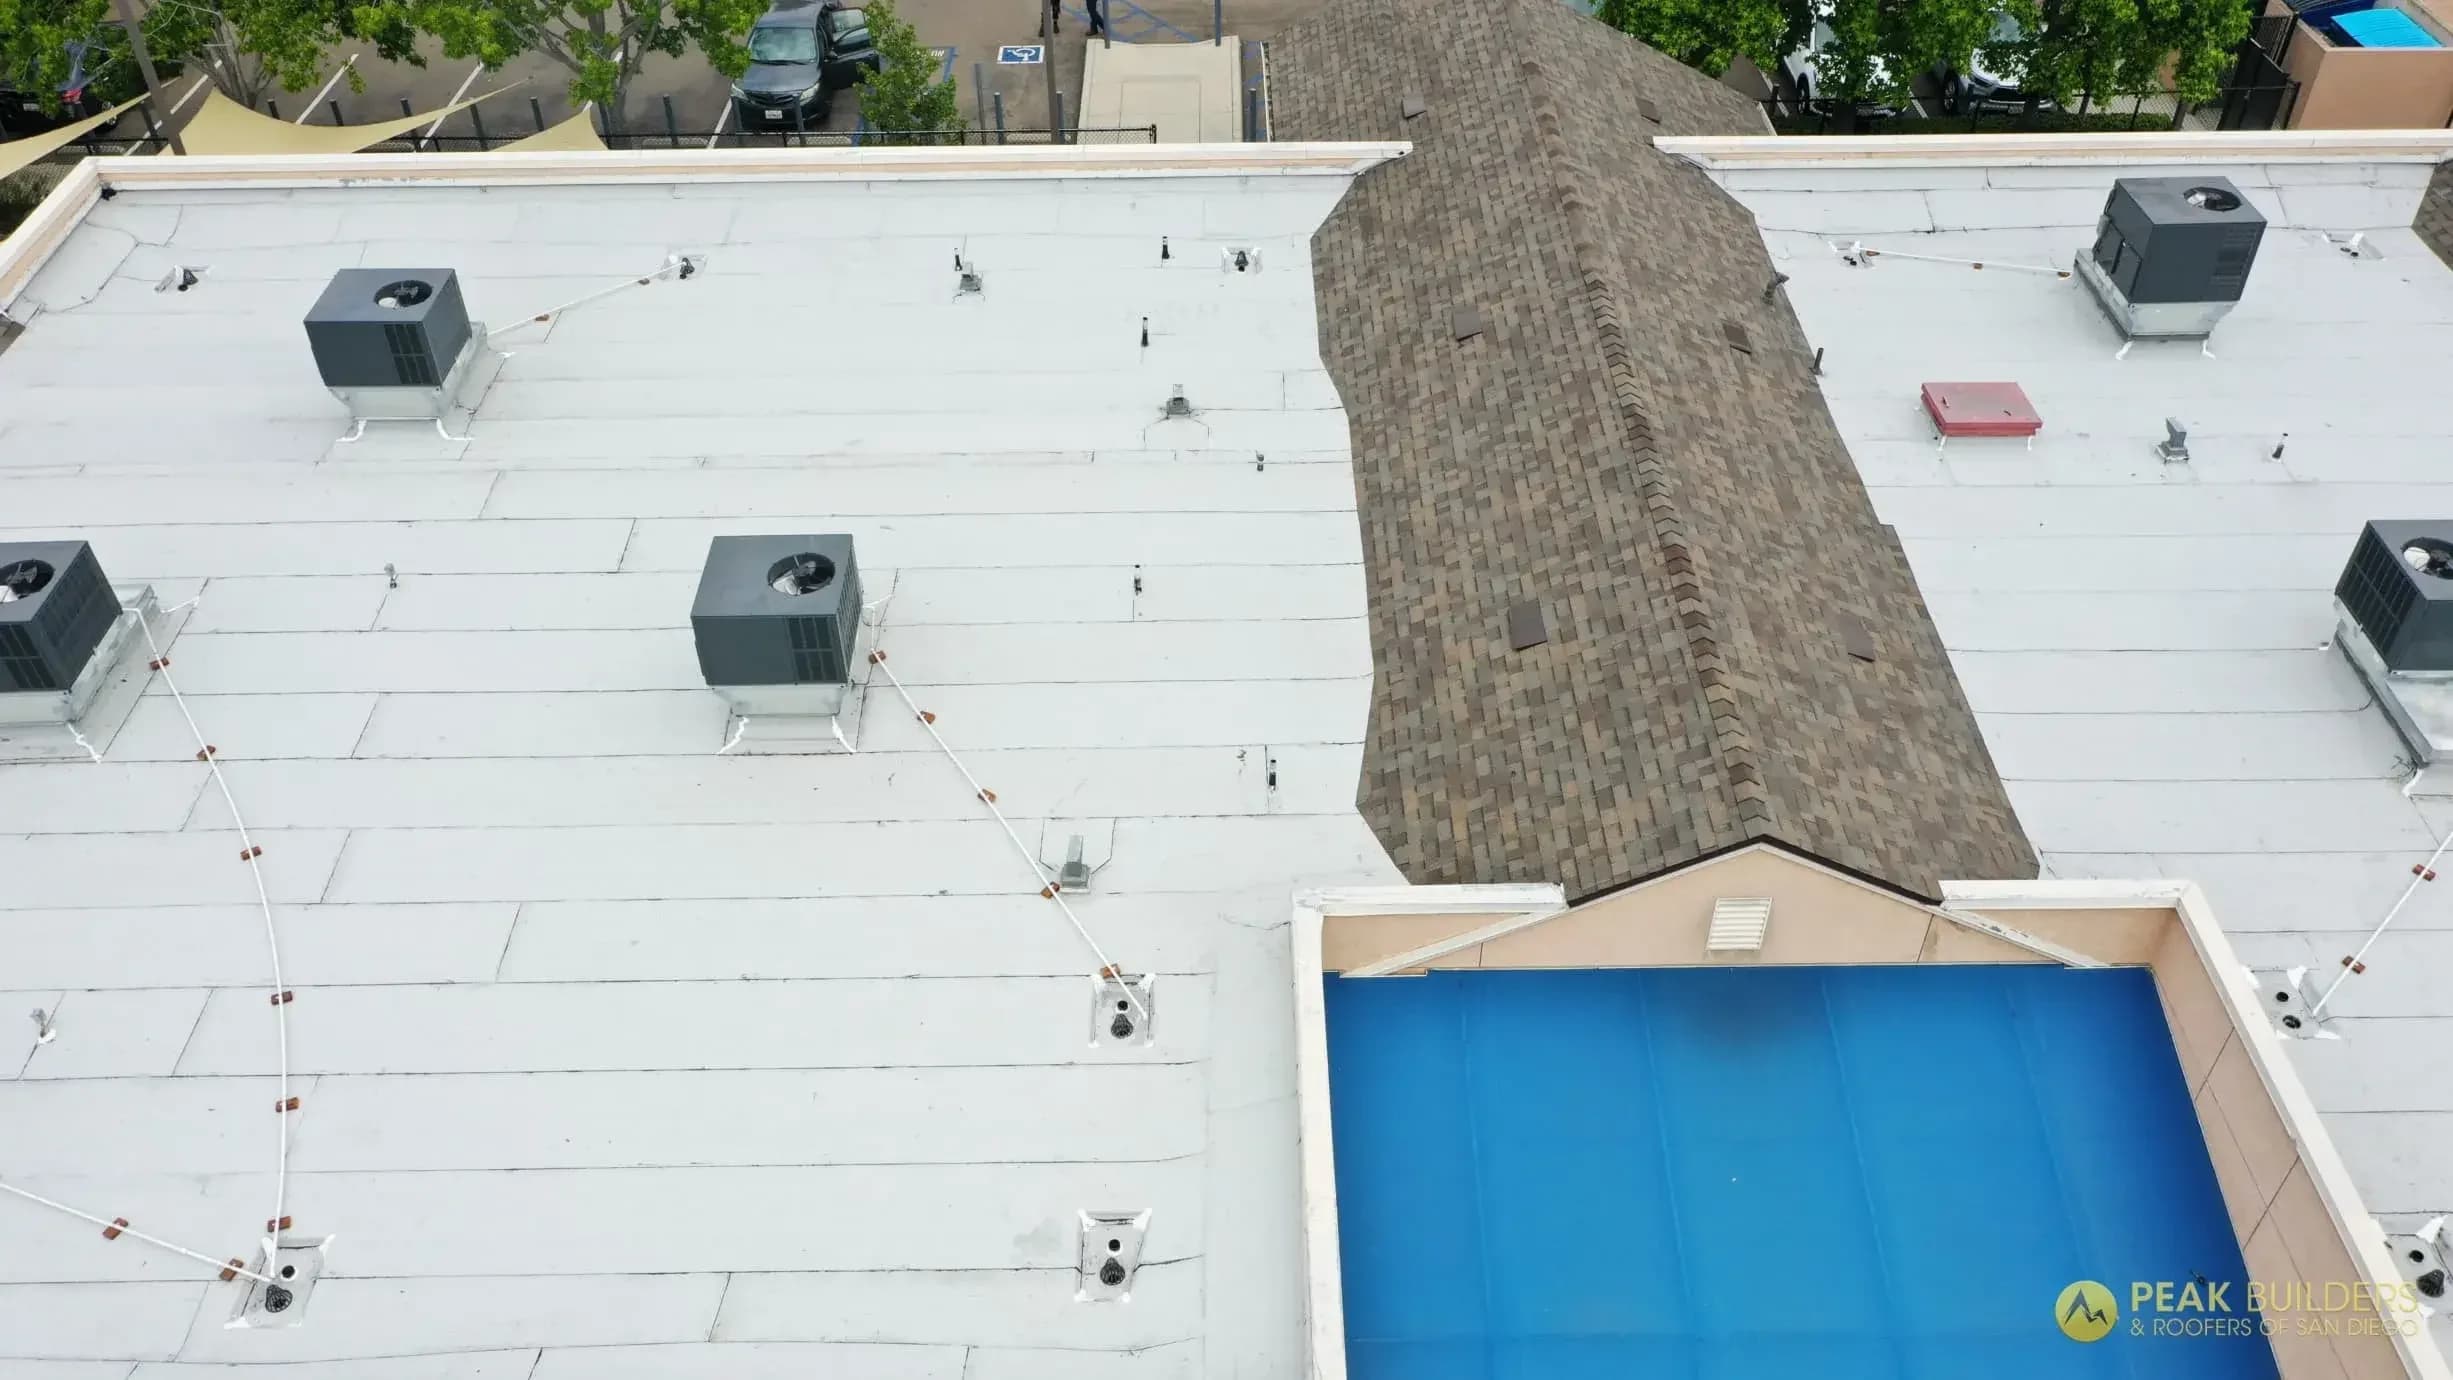
A pitched tile or shingle roof gets help from gravity; a flat roof does not. Anything called "flat" is really low-slope, ideally drained at a 2% pitch (about a quarter-inch per foot), and the membrane is the only thing standing between the interior and the weather. Three local forces wear that membrane down faster than most people expect.
First is UV. San Diego runs intense, year-round ultraviolet exposure with little cloud relief inland. UV is brutal on single-ply and asphaltic membranes — it bakes plasticizers out of TPO and PVC, oxidizes EPDM until it chalks, and dries the asphalt in modified-bitumen systems until it crazes. A flat roof in Scripps Ranch or El Cajon ages faster on the sun-facing field than the lab numbers suggest.
Second is thermal cycling. Our days swing from a cool, damp marine-layer morning to a hot, dry afternoon, sometimes 30 degrees in a few hours. The membrane expands and contracts with every cycle, and that movement is what works seams loose and tears membranes away from edges and curbs over time.
Third is salt air, and this is the one homeowners near the water underestimate. In La Jolla, Coronado, Point Loma, Del Mar, and Encinitas, airborne chloride corrodes metal flashing, fasteners, and drain components from day one. We spec stainless or aluminum flashing rather than galvanized within a few miles of the coast — galvanized doesn't last in that air, and a corroded edge metal or scupper is a leak waiting for the first atmospheric river. On shaded north slopes you'll also see marine-layer mold holding moisture against the surface, which is its own slow form of degradation.
The Problems We Actually Find
Ponding water is the most common issue, and the most misunderstood. Water that still stands more than 48 hours after rain magnifies UV damage, grows algae, adds dead-load weight, and finds its way into the smallest seam imperfection. It comes from clogged drains, an under-built original slope, or a deck that has settled into a low spot. The cause dictates the fix: a clogged drain is a maintenance call, but a sagging deck is structural.
Seam failure is where the majority of leaks originate on single-ply roofs. A properly heat-welded TPO seam should be as strong as the field membrane; a cold weld, a contaminated weld, or years of thermal movement opens a channel right where two sheets overlap. EPDM relies on seam tape and adhesive that give up over time. One reliable way to judge a repair crew is how they treat seams — a careful installer probe-tests every weld rather than eyeballing it.
Penetration and flashing failures account for a disproportionate share of leaks because every pipe, HVAC curb, conduit, skylight, and scupper is a hand-detailed interruption in the membrane. Rubber pipe boots crack from UV in five to eight years, sealant shrinks and splits, and corroded metal flashing — especially galvanized near the coast — opens gaps. When a roof inspection turns up a leak, the penetrations are the first place we look.
Blistering and membrane fatigue show up as bubbles where air or moisture was trapped at install, or as a brittle, chalky, granule-shedding surface on an aged roof. A blister doesn't leak on day one, but the stretched skin over it thins and eventually splits.
Edge and wind-uplift damage lives at the perimeter, where the membrane terminates against a parapet or drip edge. That edge is under permanent tension, and Santa Ana events — dry offshore winds gusting past 70 mph — pry at any loose termination. Santa Anas also drive ember risk; in our wildland-urban-interface fire zones, flat-roof assemblies and vents need Class A fire ratings and ember-resistant vents.
Membranes That Hold Up Here — and How Long They Last
Material choice on a flat roof is really a durability decision, so it's worth knowing what each system gives you in years. For most San Diego low-slope roofs we install TPO (reflective, heat-welds into one monolithic sheet, typically 20 to 30 years here), EPDM where a proven rubber single-ply fits (around 20 to 25 years), or modified bitumen on smaller residential sections and complex tie-ins (15 to 20 years). Our intense UV and coastal salt air push real-world lifespans toward the lower end of each range, which is why installation quality and annual maintenance matter more here than the spec sheet implies.
California's Title 24 energy code — we sit in Climate Zone 7 — has long required cool-roof (high-reflectance) membranes on low-slope replacements, and the 2025 standards effective January 1, 2026 newly extend cool-roof rules to many steep-slope residential re-roofs too. On a flat roof a reflective membrane isn't only about compliance; it lowers surface temperature and slows UV aging, so energy performance and lifespan reinforce each other. Most low-slope work also needs a City or County permit, and coastal-zone projects may require Coastal Commission review. If you're heading toward a full system rather than a patch, our roof replacement and flat roofing pages break down the options, and larger buildings should look at commercial roofing.
Repair or Replace? Read the Roof, Not the Wallet
The honest decision turns on age, the extent of damage, and safety. Repair is the right call when the roof is under about 15 years old, the trouble is isolated to a seam or a few penetrations, the field membrane is still pliable, and the deck below is sound. Replacement wins when the roof is past 20 years, problems are spread across the field, the membrane is brittle or shedding granules, or the ponding traces back to a sagging deck rather than a clogged drain.
Here's the part contractors don't always say plainly: a flat membrane past 20 years in San Diego is usually degraded across the whole field even if it isn't leaking yet, because UV ages the surface uniformly. Chasing leaks one patch at a time on a roof like that buys months, not years — the next failure is already forming a few feet over. If the deck below has gone soft underfoot, you're past membrane repair; that's a tear-off, and walking on it is a safety issue. When storm damage is involved, our storm damage restoration team can document the condition for your insurance carrier. For a clear read on which side of that line your roof sits, request a free, no-obligation inspection and quote.
Warning Signs Worth Acting On
Walk out after the next rain and look for water that hasn't drained within two days — that's a slope or drainage problem to fix before the rainy season, not during it. Inside, a ceiling stain near a flat-roof transition means water is already getting in, and it almost always appears away from the real entry point because water runs along the deck before it drops. A spongy, soft spot underfoot means the deck is wet and compromised — and a hazard to stand on. Visible separation at a wall or edge, or cracked sealant at every penetration rather than one, tells you the roof needs comprehensive attention instead of another dab of caulk.
Keeping a Flat Roof Out of Trouble
Flat roofs need more attention than pitched roofs, and the upkeep is minor relative to what it prevents. Clear the drains and scuppers in September or October, before the first storms — a single clogged drain during an atmospheric river can pond six inches of water in hours. Schedule a real annual inspection of seams, penetrations, and edges; nearly every failure is visible months before it leaks. And never sit on a known small repair — the boot reseal you defer this fall is the leak that rots a section of deck after two wet seasons. Confirm your gutters and downspouts move water away from the structure, too.
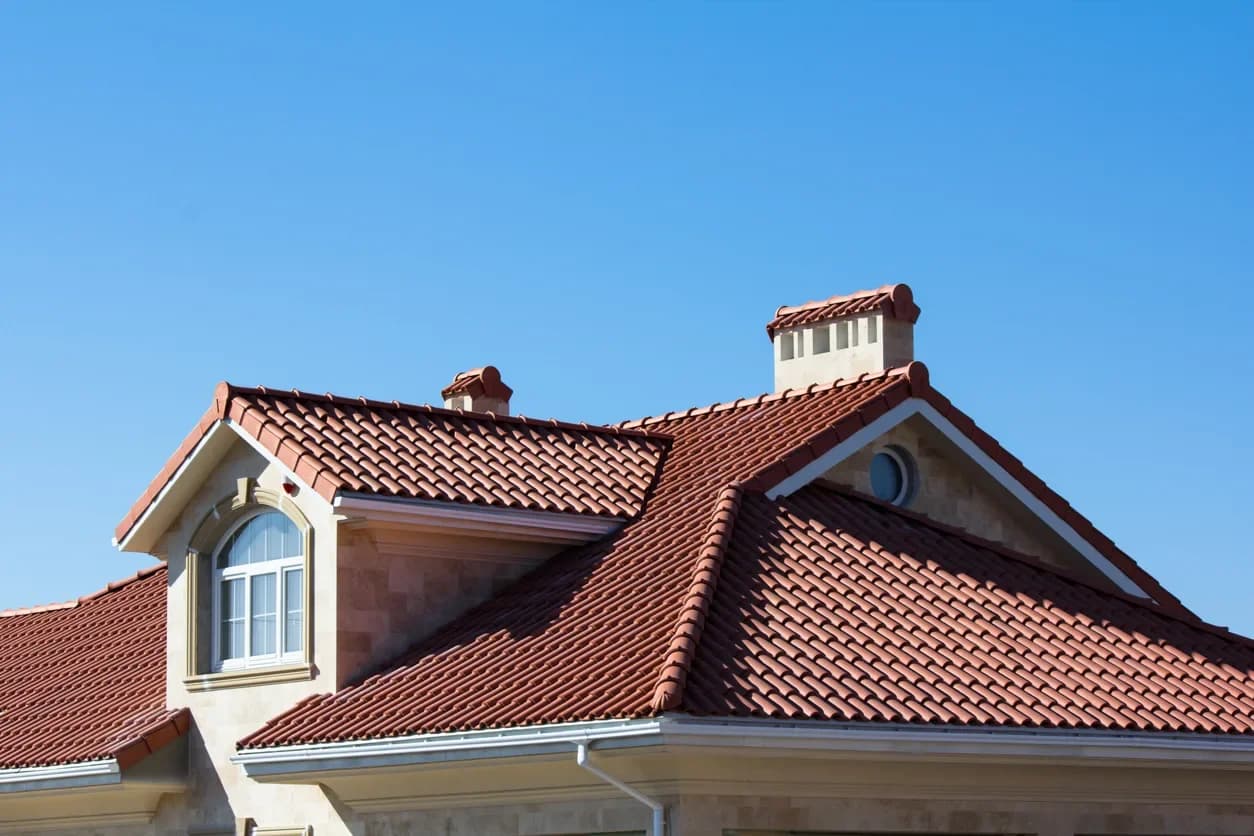
The same preventive logic applies to tile and steep-slope roofs here — on a 1920s Spanish tile roof in Kensington, the clay tiles last 50-plus years, but the underlayment beneath them fails at 20 to 25, which is why a good-looking tile roof leaks while every tile still looks perfect. Flat roofs are more honest: the membrane is the system, so when it ages, you can see it. For standing-seam transitions see our metal roofing page, and general fixes on roof repair.
Peak Builders is a GAF Master Elite and Owens Corning Platinum Preferred contractor with a 4.9-star rating across 230-plus reviews and a BBB A+ rating, serving La Jolla, Carlsbad, Encinitas, Del Mar, Coronado, Chula Vista, Poway, Point Loma, Escondido, El Cajon, Oceanside, Rancho Santa Fe, Scripps Ranch, and Santee. Meet the San Diego roofing crew or request a free, no-obligation inspection and quote at (619) 330-8185.
Frequently Asked Questions
How long does a flat roof last in San Diego?
It depends on the membrane. A well-installed TPO or PVC roof typically lasts 20 to 30 years here, EPDM around 20 to 25, and modified bitumen 15 to 20 — but our intense UV and coastal salt air tend to push real-world lifespans toward the lower end of each range, especially on unshaded fields and near the water. A reflective cool-roof membrane and annual maintenance noticeably extend that.
Can a flat roof be repaired, or does the whole thing need replacing?
If the roof is under about 15 years old and the damage is isolated to a seam, a few penetrations, or one edge, a targeted repair is usually the right move. Replacement makes sense once problems are spread across the field, the membrane is brittle, or the deck is wet. The deciding factor is membrane age and condition — and the safety of the deck underneath — not just whether it's currently leaking.
Why does my flat roof leak even though I can't see any damage?
On low-slope roofs the entry point and the interior stain are often far apart — water runs along the deck under the membrane before it finds a way down. The actual failure is usually a hairline seam split, a cracked pipe boot, or corroded edge flashing that's invisible from the ground. A walk-the-roof inspection finds these before they spread.
Should I use a reflective cool roof on a flat roof in San Diego?
Yes — and on low-slope replacements it's generally required under California Title 24 in our Climate Zone 7. Beyond code, a reflective membrane lowers surface temperature, slows the UV aging that drives most local flat-roof failures, and keeps the rooms below cooler. To weigh your options, call (619) 330-8185.